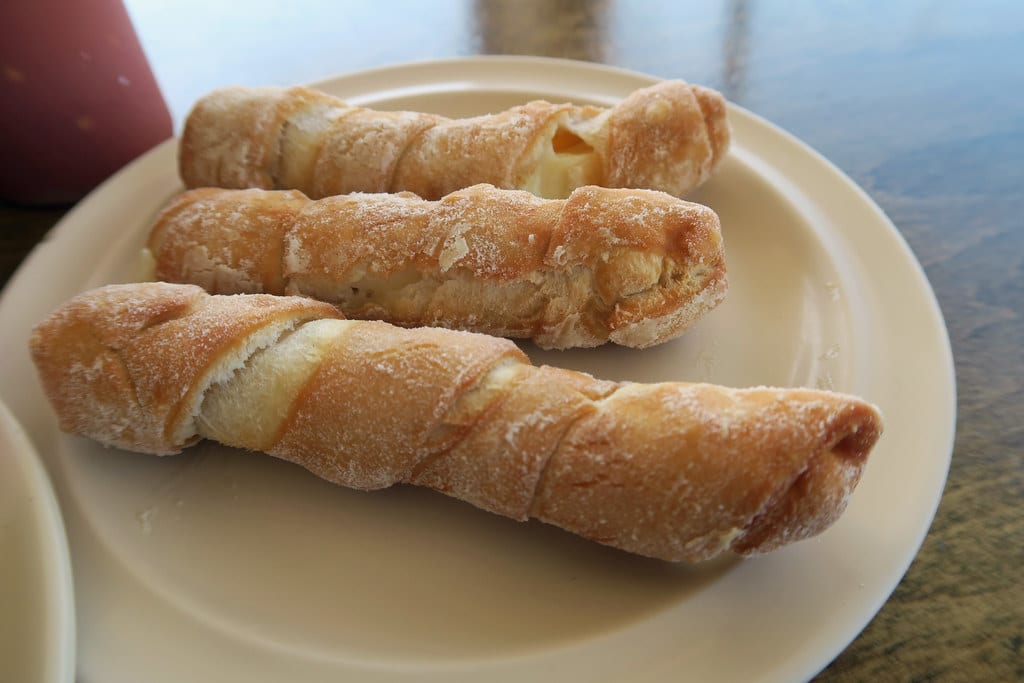
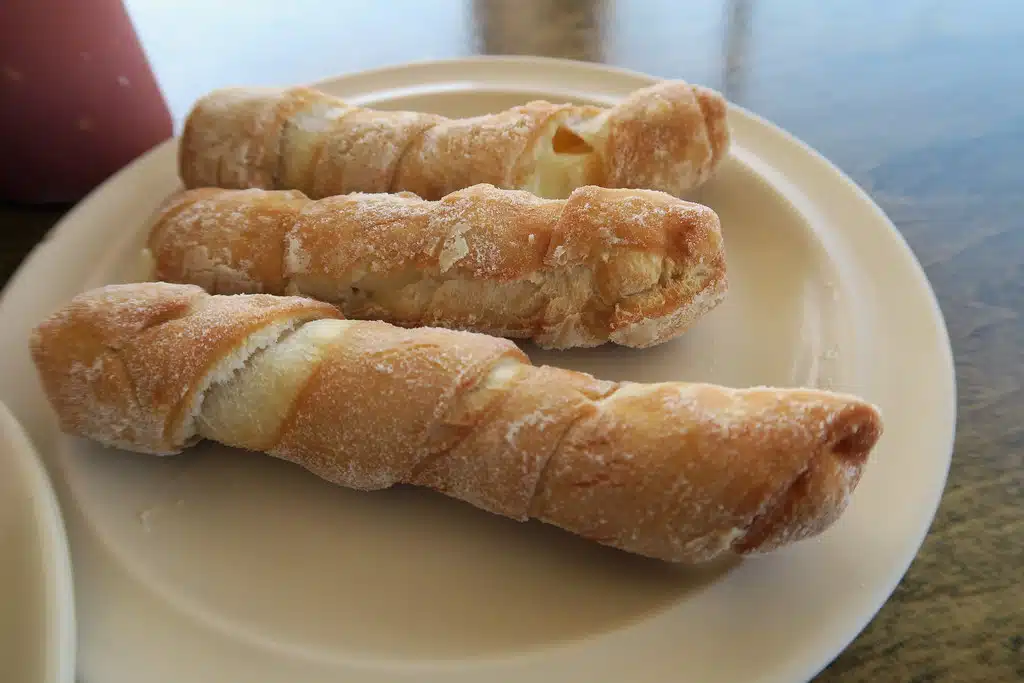
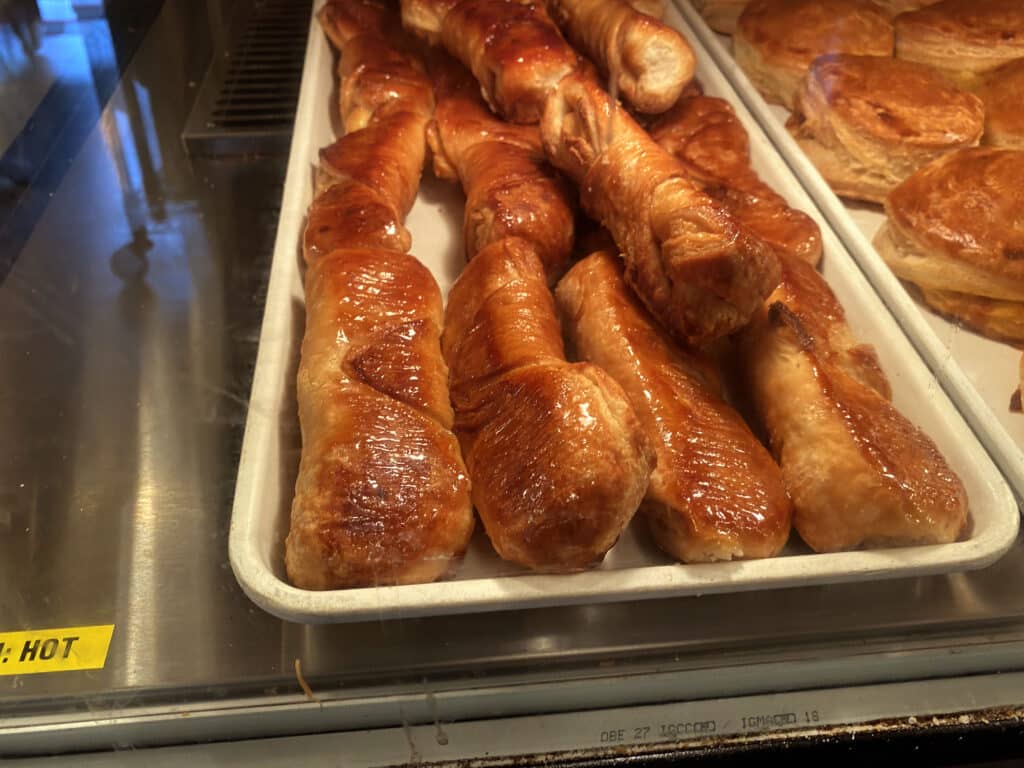
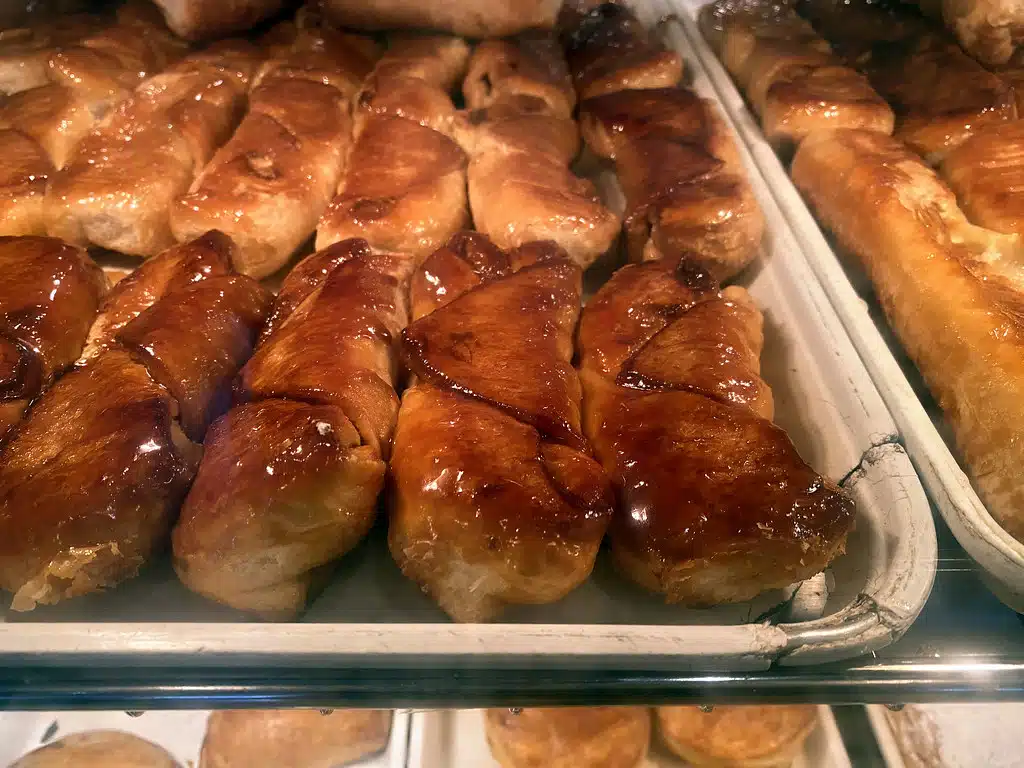
Quesito, also known as “cheese puffs” or “cream puff,” is one of the most iconic desserts from Portugal.
The original recipe was created by a French chef named Henri-Paul Pellaprat and his wife who brought it over from France.
The name “quesito” comes from the Spanish word “queso” which means “cheese.”
In fact, there are many varieties of quesitos made with different types of cheeses including mozzarella, cheddar, parmesan, and more!
What Is A Quesito?
A quesito is a delicious dessert usually filled with custard cream (custard mixed with egg yolks), chocolate ganache, praline paste (a sweet mixture of sugar and nuts) or even caramelized fruits.
It can be served plain or topped with whipped cream, fruit compote, or sometimes even mousse.
There are two basic shapes in which these sweets are typically sold: small cakes with a round bottom and larger cakes with an oval shape. They come in both savory and sweet versions but they are mostly used as desserts. There are some variations on this traditional dish however. Some people add rum, brandy or other spirits to the filling while others use milk instead of eggs.
Another difference between them and their French counterparts is that quesitos are often rolled into balls before baking so that they stay soft during consumption.
This technique makes it easier to eat because you don’t have to worry about breaking them apart once they cool down.
Finally, unlike other baked goods such as cookies and muffins, quesitos do not require refrigeration when stored.
You can keep them at room temperature for up to three days without any issues.
What Is The Origin Of Quesitos?
There are several theories about where they came from but the most popular story involves a trip across the ocean to Brazil.
It seems that this dessert originated when a French chef named Henri-Paul Pellaprat and his wife went on vacation to Brazil at some point during World War II.
While visiting Rio de Janeiro, they were offered a dish called “queixada” (pronounced KAY-zah-da) which contained a mixture of eggs, sugar, milk, flour, butter, and cheese.
This mixture was then cooked until thickened into a doughy substance.
After being baked, the resulting treat was served with coffee.
When they returned home after their trip, Henri-Paul decided to recreate this delicious Brazilian snack using what he had learned while traveling abroad.
He began making these treats using cream and cheese instead of egg yolks, sugar, and flour.
He eventually patented his version of the quesito before selling them under the brand name “Henri-Paul Pellaprat’s Quesito” in 1947.
Since then, this sweet has become an international favorite and is now available all around the world.
Today, you can find quesitos sold in grocery stores, specialty food shops, bakeries, and even restaurants.
What Are The Ingredients In A Quesito?
A typical quesito recipe consists of two main components – filling and dough.
The filling usually contains eggs, milk, sugar, and butter while the dough is either based on flour or cornstarch (like for croissants).
Other recipes may include chocolate chips or other fillings such as nuts, fruits, etc.
Here are some popular quesito recipes below:
- Coconut Cream Quesito
- Chocolate Quesito
- Pineapple Quesito
- Fruit Quesito
- Mango Quesito
- Caramelized Banana Quesito
- Raspberry Quesito
- Cherry Quesito
- Strawberry Quesito
- Peach Quesito
- Orange Quesito
1. Coconut Cream Quesito Recipe
This is an extremely simple quesito recipe using only three basic ingredients – coconut, egg yolks, and condensed milk.
It can be served cold or warm depending if you like your dessert creamy or not.
You could add additional flavorings like vanilla extract or cinnamon to give it extra sweetness.
Make sure you use unsweetened coconut flakes rather than sweetened shredded coconut since they will have less moisture content.

2. Chocolate Quesito Recipe
While this is a very easy recipe to prepare, it does require patience because the final product needs time to set up before serving.
If you want something quick and delicious, try making these mini versions instead!
They come together quickly and are perfect for snacking on throughout the day.
3. Pineapple Quesito Recipe
This is another simple quesito recipe but it has a unique twist due to its pineapple filling.
Instead of adding a layer of caramel sauce, you simply put the cooked pineapple inside the quesito so it melts into the batter.
Topped off with a light dusting of powdered sugar, this is a sweet treat that everyone loves!
4. Fruit Quesito Recipe
If you love fruit then this is definitely the quesito recipe for you.
These little treats look adorable and taste even better!
Just throw all of your favorite fresh fruit in a food processor along with a few tablespoons of granulated sugar until everything is well combined.
5. Mango Quesito Recipe
These mango flavored quesitos are super fun to eat! All you need to do is cut open several mangos and stuff them into the quesito shells.
Then top each shell with a dollop of whipped cream.
Serve chilled and enjoy!
6. Caramelized Banana Quesito Recipe
If you don’t care about how cute your dessert looks then you can always go straight for the food processor.
For this recipe, just toss bananas with brown sugar, water, and melted butter until everything becomes soft.
Once it cools down, scoop out banana chunks and place them in the center of a baking sheet lined with parchment paper.
Bake at 350 degrees Fahrenheit until golden brown and serve immediately.
7. Raspberry Quesito Recipe
Another great option for when you want a healthier dessert is this raspberry quesito recipe.
Instead of using gelatin powder, you use agar-agar which is made from red algae.
Agar-agar is naturally low in calories while still providing enough body to hold up the creaminess of the filling.
Add raspberries to the mixture and cook until everything starts to thicken up. Cool completely and serve!
8. Cherry Quesito Recipe
For cherry lovers, this recipe is sure to please! Simply mix cherries with lemon juice and zest, melted butter, confectioners’ sugar, and corn starch.
After stirring constantly, pour the mixture into a piping bag fitted with a star tip.
Pipe onto prepared cookie sheets and bake at 325 degrees Fahrenheit for 10 minutes.
Let cool completely and store in airtight containers.
How Do You Make A Quesito?
To create a quesito, start out by making a simple pastry dough using flour, butter, eggs, and milk (or water).
You will need an electric stand mixer to mix these ingredients together.
Once your dough has been mixed thoroughly, roll it into small balls about 1 inch wide and place them on baking sheets covered in parchment paper.
Next, let the quesitos proof at room temperature for 30 minutes before rolling them in egg wash and sprinkling them with sugar.
After this step, they can be baked until golden brown.
If you prefer softer quesitos, leave them unglazed after the first round of glazing.

What Is The History Of Quesitos?
Henri-Paul Pellaprat came to Portugal in 1849 where he met with King Pedro IV.
He then went on to open his own restaurant called Le Restaurant de la Cour Royale (the Royal Court Palace) where he served traditional dishes like this quesito recipe.
After several years at La Corte, Pellaprat decided to return back to France because his wife had fallen ill.
When he returned home, he opened another restaurant called Les Trois Frères (Three Brothers).
Here he served his famous quesito recipes again.
In 1903, Pellaprat died while working at his third restaurant.
After his death, his son took over the business and continued making quesitos until 1917 when World War I broke out.
At the time, the family sold their restaurants so they could focus all of their efforts on war supplies instead.
During WWII, Pellaprat’s grandson became a military pilot but never returned home after being shot down during an aerial battle.
His grandfather passed away shortly thereafter leaving no heirs behind him.
So, the tradition of quesitos ended.
However, the popularity of quesitos didn’t die out completely.
Many people were still interested in these cheesy pastries so in 1958, a man named Domingos Rodrigues started selling them at a local market.
How Did Quesitos Become Popular?
Quesitos were originally developed in Paris when the Pellat family decided to make them using their own milk products like butter and cheese.
They used a mixture of water, flour, eggs, sugar, and salt to create puff pastries filled with whipped egg whites and then topped off with melted cheese.
Since they didn’t have the technology to freeze food back then, the puff pastry had to be cooked on hot plates so that it would defrost quickly enough to form the shape of a ball before being placed into the oven.
Once baked, they would fill the center with fresh cream and top it all off with grated cheese.
At first, they only sold these sweet treats at the restaurant where they worked but soon after, people started buying them for dessert parties and special events.
It wasn’t long until the quesito became an instant hit throughout Europe and America.
Nowadays, you can find delicious versions of this classic dessert in bakeries and grocery stores across the world.
Ingredients
- 1/4 cup (60 g) unsalted butter
- 1 1/2 cups (200 g) all purpose flour
- 1 teaspoon granulated sugar
- 1/8teaspoon baking powder
- Pinch kosher salt
- 6 large eggs, separated
- 1/4 cup (50 g) unsalted butter, softened
- 2 tablespoons confectioners’ sugar
- 1 tablespoon heavy whipping cream
- 2 teaspoons vanilla extract
- 1 pound (450 grams) shredded Monterey Jack cheese
- 1/2 teaspoon ground cinnamon
- Cinnamon sticks or nuts, for garnish
Directions
Preheat your oven to 425 degrees Fahrenheit.
If you don’t have a kitchen thermometer, place two pieces of tape inside your oven to measure its temperature.
When the thermometer reads 350 degrees F, your oven has been preheating properly.
In a medium bowl, combine the butter and sugars together with your hands until well mixed.
Add the dry ingredients and mix again until combined. Make sure not to use too much flour because we want our dough to stay soft.
Add the six egg yolks to the butter and sugar mixture and start mixing again.
You will notice that the dough starts to get stiffer as you add the eggs.
That’s okay — just keep working the dough until everything combines nicely.
Now, let the dough rest while you prepare the filling.
Combine the remaining ingredients in another bowl and beat the mixture with a hand mixer until smooth and creamy.
Using a spatula, gently fold the filling into the dough.
Don’t worry if the filling doesn’t go completely through the dough.
Just leave small chunks of filling to give the quesito a nice texture.
Take half of the dough and roll it out between 2 sheets of parchment paper until it becomes about 3 inches thick.
Remove the top sheet of parchment paper and cut the dough into circles with a 5-inch diameter cutter.
Gently lift each circle up and put onto a cookie sheet lined with parchment paper.
Repeat with the other half of the dough.
Once all the dough circles are formed, carefully remove the second piece of parchment paper and bake them for 16 minutes.
After removing the cookies from the oven, let them cool down for 10 minutes before adding the filling.
To assemble, take one cooled quesito and brush the bottom side with heavy whipping cream.
Then spoon a generous amount of filling in the middle of the quesito.
Top with a layer of shredded cheese and sprinkle with a pinch of cinnamon.
Carefully flip the quesito over and repeat the process.
Place the quesitos on a wire rack covered with aluminum foil until ready to serve.
Serve warm with powdered sugar and garnished with cinnamon sticks or nuts.
What Are Some Variations Of Quesitos?
In addition to the classic cheese filled quesito, you will find other versions like those stuffed with chocolate chips, nuts, caramel, or even cinnamon and sugar.
Some restaurants have an entire menu dedicated to these treats so be sure to look around before ordering your next treat!
Cheese Quesito
- Classic Cheese Quesito Recipe
- Cinnamon Roll Quesito Recipe (with Cinnamon)
Stuffed Quesito with Chocolate Chips
- Chocolate Chip Stuffed Quesito Recipe
- Caramelized Apple Quesito Recipe
- Pumpkin Cheesecake Quesito Recipe
Quesito with Nuts
- Nutty Cashew Quesito Recipe
- Almond Crusted Quesito Recipe
- Peanut Butter Filled Quesito Recipe
Quesito with Caramel
- Maple Pecan Caramel Quesito Recipe
- Honey Hazelnut Caramel Quesito Recipe
- Molasses Brown Sugar Quesito Recipe
Apple Pie Quesito
- Spiced Pear & Cranberry Quesito Recipe
- Baked Apple Cheesecake Quesito Recipe
- Raspberry Cream Cheese Quesito Recipe
Quesito with Cinnamon
- Sugar Cookie Quiesito Recipe
- Mini Pumpkin Spice Cake Quesito Recipe
- Oatmeal Raisin Cookies and Cream Quesito Recipe
Quesito with Vanilla Bean Paste
- Vanilla Bean Pastry Cream Quesito Recipe
- White Chocolate Raspberry Cheesecake Quesito Recipe
- Orange Meringue Sandwich Quesito Recipe
How Do You Serve Quesitos?
These little pastries can be eaten on their own but they usually come in a box with other baked goods like cookies or brownies.
They are very popular at coffee shops throughout New England where people often order them after lunch.
You can make your own quesitos too using this easy recipe below.
It takes about 30 minutes to prepare so if you have time make these ahead of time while the dough rises.
You can freeze the filled quesitos until ready to bake (they will take longer to cook) or you can just pop them into the oven right away.
- Ingredients:
- 1/4 cup butter melted
- 3 tablespoons milk
- 1 1/2 cups flour
- 1 tablespoon sugar
- 1 teaspoon salt
- 1/2 teaspoon baking powder
- 1 egg yolk mixed with 2 tablespoons water
- 12 ounces sharp white Cheddar cheese
- Directions:
- In a bowl combine the ingredients together and knead well. Place the mixture onto a floured surface and roll out into a rectangle shape about an inch thick. Cut into 12 equal squares.
- Use a small cookie cutter to cut out circles from each square.
- Fill each circle with 1 ounce of cheese.
- Place back onto the greased pan and cover with plastic wrap. Let rise for 10 minutes before baking at 375 degrees Fahrenheit for 15 minutes.
What Are Some Tips For Making Quesitos?
There are two main steps in making these tasty treats:
- Baking them, then frying them up like fritters.
- Filling them with custard or other sweet fillings.
First, let’s talk about baking.
You can either use a baking sheet lined with parchment paper or simply line your pan with aluminum foil so your quesitos won’t stick together while they bake (this may take longer).
Then you just need to preheat your oven to 375° F.
Once your oven has heated up, add your dough balls into their respective pans and give them a little space between each other.
Bake until golden brown on top, approximately 20 minutes.
Then, remove them from the oven and allow them to cool completely before moving onto the next step — frying them up.
To fry your quesitos, heat up oil in a deep skillet or Dutch oven.
When hot enough, carefully place your quesitos into the oil one at a time.
Fry until golden brown on both sides, approximately 4 minutes per side.
Remove them from the oil and place them in an ice bath to prevent further cooking (you want to keep them warm but not hot).
Next, we will move onto filling these delicious pastries.
There are several options available depending on what kind of flavor you prefer.
I personally love adding lemon zest, vanilla extract, sugar, and cinnamon.
If you don’t have any of those ingredients on hand, no worries!
Just skip this part if you aren’t interested in it.
What Are Some Common Mistakes People Make When Making Quesitos?
If you want to really master making your own quesitos, then you should know how to avoid the following common pitfalls in order to ensure they turn out perfect every time.
- Overworking the dough – A lot of people tend to overwork their dough too much. This causes them to use way too much flour so that they end up with a very dry crust. Also, if you have a hard time handling the dough, you might add too much water at once which will cause your dough to be sticky and difficult to work with.
- Using an oven thermometer – If you don’t have access to an oven thermometer, then always assume that your oven temperature is not accurate. You can never bake something correctly without knowing the actual temperature inside your oven. Make sure to double check that your oven is calibrated before baking anything.
- Not preheating your oven properly – When you first get started cooking quesitos, it may seem like a good idea to put them in the fridge right after mixing the dough. However, this only makes things worse because you won’t be able to fully expand the air bubbles and create the light and fluffy texture that gives these pastries their unique shape.
- Baking the wrong size – One of the biggest errors that I see people making is trying to use a larger diameter cookie cutter than what is recommended on the package. For example, if you try to cut out cookies using a 2 ½ inch diameter cookie cutter rather than 1 ½ inches, then you run the risk of having the edges of the cookies tear off during baking.
- Failing to proof the dough – Many times, people fail to proof their dough enough. This results in dense, heavy, and bland quesitos. To prevent this, you need to let the dough rise slowly until it reaches about 80% of its final volume. After you do this, cover the bowl loosely with plastic wrap and allow it to sit in a warm area for 30 minutes (or less) to complete the rising process.
- Making a mess while rolling out the dough – It doesn’t matter whether you’re working alone or with others, make sure to keep everything clean and organized. Always roll out the dough onto parchment paper instead of directly onto a countertop where you can easily ruin everything. Once you transfer the rolled out dough onto a cutting board, carefully place another sheet of parchment paper underneath so that you can move around freely without worrying about smearing any grease or crumbs.
- Not letting the quesitos cool down completely – Most recipes recommend that you refrigerate the quesitos immediately after baking them. By doing this, you give the filling time to set and solidify into a nice creamy consistency. Not allowing it to cool down all the way will result in a soft and overly moist cake.
- Choosing the wrong type of filling – The fillings used for quesitos come in two basic flavors: sweet and savory. Sweet fillings include chocolate ganache, caramelized bananas, and lemon curd, whereas savory ones include spinach artichoke dip and pesto.
- Adding salt to the batter – Adding salt to the dough itself will toughen up the surface of the quesitos and make it harder to remove from the pan. Instead, sprinkle salt on top of each quesito just before baking.
- Cleaning the pan – Never scrape out the excess batter from the bottom of the pan. Doing this creates holes in your quesitos and allows moisture to escape. Instead, simply tilt the pan back slightly and tap the bottom gently against the edge of the countertop to release any extra liquid.
- Saving leftover batter – Don’t save leftover batter for later use. Because it contains eggs, it needs to be stored in the refrigerator within four hours of being mixed together. Otherwise, you could potentially develop bacterial growth which leads to food poisoning.
- Forgetting to brush egg wash on the tops of the quesitos – The last step in making quesitos involves brushing an egg wash on the sides of the baked cakes. Although it seems simple, this step ensures that the cakes stay moist and flaky throughout.
Equipment
- 1 Pan
Ingredients
- 1 egg yolk
- 1 tablespoon cold water
- 1/4 pound puff pastry dough
- 8 ounces cream cheese
- 1/2 cup granulated sugar
- 1/2 cup light corn syrup
- 1/4 cup granulated sugar
- 1/4 cup cold water
Instructions
- Set the oven to 400°F. Set aside a sheet pan that has been lined with parchment paper or a silicone baking mat.
- To make the egg wash, combine the egg yolk and water in a small basin and whisk until there are no visible yolk clumps.
- Roll out your puff pastry dough and cut it.
- Roll your puff pastry dough into a 24″ × 15″ rectangle on a floured surface using a strong rolling pin. Cut the dough into 12 equal rectangles, each measuring about 4″ broad by 7″ long, using a pastry cutter.
- Slice off any extra dough.
- On the side of the puff pastry that is facing the inside of the pastry, place a baton of cream cheese and a 1/2 teaspoon of granulated sugar side by side.
- Apply a thin layer of egg wash to the rectangle’s short sides (also known as the “top” and “bottom”) with a pastry brush after adding the sugar.
- To encase the cream cheese in the dough, fold the ends over.
- More egg wash should be applied to the long edge that is opposite the cream cheese side.
- Roll the dough to the egg-washed side starting on the side with the cream cheese stick to form a cigar-shaped pastry. Once you’ve reached the egg-washed flap, gently rock the quesitos to seal it entirely.
- Brush a thin layer of egg wash on the tops and sides of each quesito before transferring it to the sheet pan.
- After brushing, insert fork tines into the tops of the quesitos to create vents.
- For 15-20 minutes, or until they are a deep golden colour and appear dry rather than glossy, bake the quesitos in the preheated oven.
Video
Nutrition
My blog is all about creating delicious meals with ingredients that are easy to find in your local grocery store. I’m passionate about making yummy meals that I can share with my friends and family.