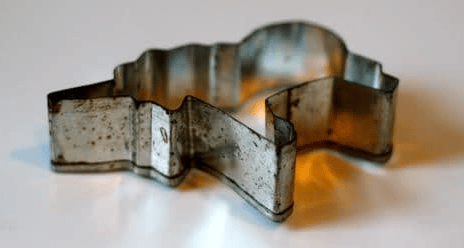
Rusty cookie cutters can ruin the perfect baking experience. Cracked and twisted cookie edges are not only a big letdown; they also affect the taste of your freshly baked cookies. It is vital to know how to remove rust from cookie cutters because it is not safe for your health and your household. Also, it can leave a mark on your cutter in such a way that you might end up disposing the cookie cutters.
Rust can ruin your cooking tools. Cookie cutters stored away in the garage and left unused for a longer duration end can easily get rust. The process of removing rust from cookie cutters depends on how rusty the cookie cutter is. Little steps will deliver what you want to you sooner than if you start with big steps and end up with small results.
Now that the baking season is upon you, and as you have to bake batches of cookies for family, friends, and neighbors, you don’t want any rust from the cutter to affect your cookie’s end product. Should you throw out the cookie-cutter all because of the fact it is rusty? We have the right information on all you need to know about removing rust from cookie cutters without stress.
 Few methods can be used to remove rust from cookie cutters. Make sure you clean your cookie cutters regularly, whether they are made of metal or plastic.
Method 1
Oven cleaner is another option for removing rust. Spray the oven cleaner onto the rust and let it sit for about an hour or two before rinsing and scrubbing with soap and water. Make sure you rinse thoroughly because leftover oven cleaner will leave chemical burns on your skin.
Method 2
Hydrogen peroxide is another option that works when the rust has spread across your cookie-cutter fairly evenly.
To remove rust from your cookie cutters with this method, fill a small glass with warm water and add about 1/2 teaspoon of regular household or 3 percent hydrogen peroxide. Gently place the cookie cutter into this solution, hold the glass in place for a few minutes to ensure that it is completely immersed, take out the cookie cutter and let them air dry.
Method 3
Rust remover powder: This is actually white powder that will remove red rust from your metal objects. There are many ways on how to remove rust from cookie cutters using rust remover powder. The first way is by adding the cookie-cutter affected area to the solution and letting it stay for 20 minutes. Then you can wipe away the powder; if you see that there’s still one part of the rust left, repeat until all are gone.
Also, you can put on gloves if you don’t want to stain your hand, then just scrub the surface of your metal object with soap. After doing this, you can use a toothbrush to add vinegar to rewash it. After doing this, you will have your cookie-cutter clean and shining.
Method 4
You can wipe off the rusty part in a cookie-cutter with a damp sponge or cloth and then dry with a paper towel. If the rust is worse, you can soak the cookie cutters in white vinegar overnight, then scrub them with baking soda and water. Rubbing the cutter with steel wool or sandpaper works best but be sure to use caution not to scratch your cutter.
No products found.
Types of Cookie Cutters
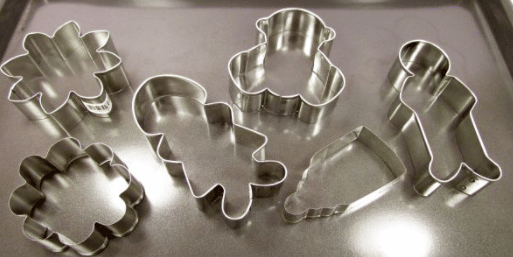
 Cookie cutters come in different shapes, from simple to extravagant. Below are common types of cookie cutters and how they differ from each other, along with some additional tips on choosing the best one for your needs.
Stainless-Steel Cookie Cutters
Stainless steel cookie cutters. You can use these mainly for baking your cookies, but they work well for craft projects as well. The stainless steel makes them extra sturdy and tough, while the smooth finish lets them glide through dough easily and cleanly.
The stainless-steel material is relatively rustproof and does not require as much maintenance to avoid rusting. In addition to these properties, stainless steel also has the advantage of being extremely durable without breaking down quickly or becoming weak. It is the most commonly used material for producing Cookie Cutters.
Aluminum Cookie Cutters
Aluminum Cookie Cutters have been around since the early Half of the 20th Century. The Aluminum material used to produce this cookie cutter is durable and has a longer life span. They were also cheaper to produce than other cookie cutters. Because of their cost-effective nature gained popularity fast and had widespread use in every industry that needed cookie cutters.
Aluminum cookie cutters can be used to cut various materials such as fondant, chocolate, and clay. These types of cutters are very affordable and require no maintenance. They are great for all-purpose cookie baking, cooking, and crafts. This Cookie Cutters are very sturdy with attention to detail.
This is an extremely versatile item used year-round at Christmas time for cookie decorating and other occasions. It is also lightweight and easy to use.
Copper Cookie Cutters
Copper cookie cutters have always been popular. They are great for making gingerbread men, logos, whimsical shapes, and letters. With their shiny finish and smooth edges, these cookie cutters will leave your cookies looking like they came from a professional bakery.
Their shine will add elegance to your cookies, and their durability will outlast all other cookie cutters. Copper cookie cutters are made from heavy-duty steel with a shining copper finish that will not tarnish. Copper cookie cutters can even be used for decorating cupcakes or for cutting out shapes in bread dough.
Plastic Cookie Cutters
Plastic cookie cutters are a cheap alternative to metal. It can easily be washed in a dishwasher and can withstand up to 500 pounds of force applied to each cutter. Plastic cookie cutters come in many different shapes, so you are guaranteed to find the perfect cutter for your cookies.
Plastic ones will melt if placed against a hot oven or heated too frequently. We suggest hand washing them with soap and water before each use.
Recommended Post: How much does buttermilk cost
No products found.

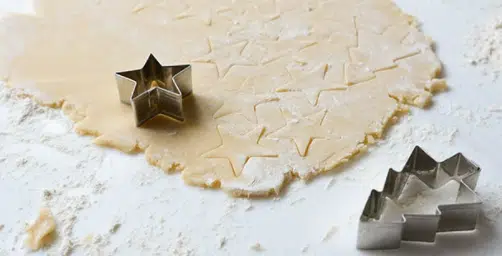 Cookie cutters are invaluable gadgets for baking. What exactly are cookie cutters, and how do you use them? Here are some helpful hints:
Cookie cutters help you create thousands of different cookie shapes. Make birthday favors, special holiday treats, or just something fun and new using these creative cookie tools. Each cutter is made from sturdy metal, and they’re easy to use. Press gently to cut through the rolled dough—no chilling of the dough is required.
Before you start baking cookies, place your cookie cutters in the freezer to make sure they will not warp at all. This prevents them from shifting during the cutting or baking process. You have to place the cookie cutter on top of the dough and push it so it will shape a piece of dough inside it. Not very elaborate and not very intriguing.
Why Are My Cookie Cutters Rusting
It is natural for the metal of cookie cutters to rust when exposed to some elements. All cookie cutters are made from high-quality materials, but they will eventually start to show signs of rust due to their use with water and oxidation through exposure.
Also, when making cookies, sometimes cookie cutters stay wet too long, causing them to rust.
You can keep your cookie cutters rust-free by coating them with vegetable oil or shortening them, wiping off any excess, and storing them in a cool, dry place. It will also keep your cookie cutters from sticking together. Never place a cookie cutter in water to clean it; this will cause the cookie cutter to rust even faster and not be reusable.
Are Metal Cookie Cutters Dishwasher Safe
Metal cookie cutters are dishwasher-safe. However, we do not recommend putting any cookie cutter in a dishwasher as each machine is different. Cookies can get damaged during a cycle if they do not come out of the dishwasher while still running on hot/sanitize or any other setting.
Although, Metal cookie cutters can be placed on the top rack of your dishwasher. Be sure always to follow manufacturer instructions when putting it in the dishwasher.
The important thing is not to let water sit on them, and after you wash them, immediately dry them completely by hand.
No products found.
Frequently Asked Questions
How do you clean tarnished cookie cutters?
Place the tarnished cookie cutters in a plastic container and fill them with equal baking soda, vinegar, and hot water. You can soak overnight or longer. Then rinse, dry, and store away from sunlight.
It is not safe to use a cookie-cutter that has rust or chips in it. Cookies cut with broken cookie cutters are often burnt, ugly, and contaminated by any metal dust that caused the cookie cutter to be chipped or rusty. The same goes for old cookie cutters.
The best way to clean cookie cutters is to soak them in warm, sudsy water for a few minutes. Scrub with a soft sponge or plastic scouring pad that won’t scratch the cutter’s metal surface.
No, stainless steel cookie cutters are rust-resistant. Each is stamped with a special formula that prevents rust and oxidation. Stainless steel cookie cutters keep their finish for a lifetime. However, they can rust if they come in regular contact with acidic liquids such as vinegar and lemon juice.
Metal is the superior material. Metal cookie cutters are more durable and less prone to breakage than plastic cookie cutters. And metal, unlike plastic, does not absorb odor, is rustproof, and will not chip nor cannot melt in the oven. And it’s so much more fun to use them.
Conclusion
Most cookie cutters will rust if not dried and stored carefully after every use; maintaining it can be very simple and easy if you can take proper care of it. In a case where cookie cutters are getting rust, you need to know how to remove rust from cookie cutters, and that’s what we have stated above. It’s better to remove the rust instead of baking with it can be dangerous to your health.

Equipment
- 1 Bowl
- 1 Oven
Ingredients
- 2 cups all-purpose flour
- 2½ Tbsp matcha green tea powder
- ¾ cup unsalted butter
- 1 cup powdered sugar
- pinch kosher salt
- 2 egg yolks
- ¼ cup chocolate chips
Instructions
- In a big bowl, mix the matcha green tea powder and all-purpose flour.
- Matcha powder and flour should be sifted.
- Beat the unsalted butter until it is smooth and creamy using a hand mixer or a paddle attachment on a stand mixer. It’s crucial to soften the butter in advance.
- Blend with a pinch of salt.
- Beat well after adding the powdered sugar until it is soft and light. Stop the mixer occasionally while blending to scrape down the bowl.
- When mixed, add the egg yolks and stir well.
- Add the flour mixture gradually while blending the matcha mixture until barely mixed.
- The dough should be divided in half if you’re preparing 24 cookies. Form into cylinders that are 7 inches (18 cm) long and 112 inches (4 cm) in diameter.
- The logs should be covered in plastic wrap and chilled for at least two hours to reach firmness.
- Set the oven’s temperature to 350°F (175°C). Reduce the cooking temperature by 25oF (15oC) for a convection oven. Use silicone baking liners or parchment paper to line a baking pan. Take the dough out of the fridge, then remove the plastic wrap.
- After being taken out of the oven, the cookies should cool for five minutes on the baking sheet before being carefully moved to a wire cooling rack to finish cooling.
Video
Nutrition
My blog is all about creating delicious meals with ingredients that are easy to find in your local grocery store. I’m passionate about making yummy meals that I can share with my friends and family.