When it comes time to bake something delicious like bread or pizza, there’s nothing quite as satisfying than biting into one of your own creations.
But if you don’t have access to fresh-baked goods, then you should turn to your kitchen arsenal.
One such item is called a “poolish,” which is an ingredient mixture that you can use in place of regular flour when making baked goods.
What Is Poolish?
Poolish refers to a pre-ferment (or preferment) that is mixed with some of the flour that will eventually go into the finished product.


The remaining part of the flour is reserved for later mixing.
You may know poolish by other names including sourdough starter, sponge, biga, mother, and levain.
All these terms refer to the same thing — a mixture of flour, water, and yeast that has been allowed to ferment over time.
The fermentation process changes the chemical composition of the flour, causing some starches in the flour to break down into sugars, while proteins get broken up into amino acids.
This makes the flour more digestible so that you can eat it without having to chew on it for too long.
In addition to this, the enzymes produced during the fermentation make the gluten stronger, allowing you to work with less flour when kneading the dough.
In order to produce poolish, you need just three things: flour, water, and yeast.
If you want to create your own poolish, all you need to do is mix together equal parts of bread flour, whole wheat flour, and water.
This ratio works well for most people since they tend to consume large quantities of bread.
After you combine them well, add 1 tablespoon of sugar and 2 teaspoons of salt to give the poolish its signature tanginess.
You also need to add two packets of active dry yeast because this type of yeast contains both heat-stable and heat-sensitive strains.
Heat-resistant yeasts help the poolish keep longer, but the heat-sensitive ones speed up its aging process.
Once everything is combined, cover it loosely with plastic wrap and leave it alone until it starts bubbling and smelling sweet after 24 hours at room temperature.
What Are The Ingredients In A Poolish Recipe?
A poolish is essentially a pre-fermented cake made with some of the same ingredients that will go into the finished product.
The difference between a poolish and a sponge is that a poolish contains less liquid than a sponge does.
So while both contain flour, eggs, sugar, leavening agents (yeast), salt, and sometimes fats, they differ in how much of each is used.
Poolishes are typically not only used for bread but also other items including cakes, muffins, cookies, and even pizza crusts.
They work well because they give the bakery what they need without requiring them to make a large batch of the product on their own.
This helps keep prices low since bakeries aren’t wasting any materials by using a poolish instead of just buying premade products.
How Do You Make Poolish?
A poolish is a preferment used in baking. It is made from a portion of the flour, water, and yeast that will be used in the final dough.
Poolish is often referred to as a sponge because of its light texture, but this name doesn’t really fit since it has more of a firm consistency.
The term “sponge” was also used for the original English version of poolish, although this eventually became outdated with the word ‘poolish’ being adopted instead.
There are two types of poolishes: sourdough and straight.
- Sourdough Poolish
- Straight Poolish
The first type uses a combination of whole wheat flour and all purpose white flour.
This type tends to create a loaf with a chewy crust that may not rise very well during baking.
You can substitute up to 50% whole grain flour (wheat, rye, barley) or other flours to form the base of your poolish.
If you want to use only whole grains, check out our guide on how to start a homemade sourdough starter.
If using whole grains, increase the amount of water by half the weight of the total flour added to the mix.
For example, if you plan to add 100 grams of flour, add 150 milliliters of water.
You can adjust these amounts according to your preference.
To begin the process of creating a poolish, combine the dry ingredients with the remaining liquid in a bowl.
Mix thoroughly until no large lumps remain.
Add any additional ingredients, including salt and/or sugar, and give it another stir before covering and leaving overnight at room temperature.
Once the poolish reaches room temperature, it will become bubbly and slightly foamy.
At this point, you can either leave it alone and let it ferment further or proceed with the next step.
If you decide to continue with the fermentation process, transfer the poolish back into the mixing bowl you used previously.
Use a rubber spatula to fold the contents together using circular motions.
Continue doing so until the entire mixture becomes uniform and smooth in appearance.
Add the warm water and yeast and mix again until combined.
Cover the bowl tightly with plastic wrap and store in a cool location away from direct sunlight for 4 hours.
Once this period passes, transfer the batter into a clean glass container, cover, and allow to ferment for 12 to 24 hours.
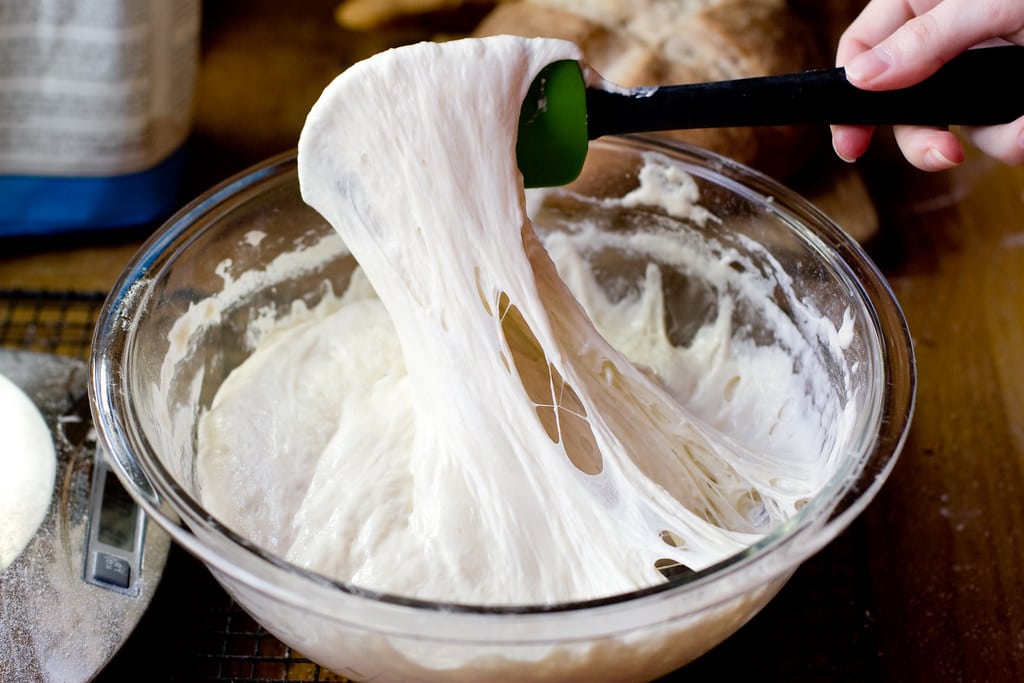
Afterward, the poolish will develop bubbles around the edges similar to what you see here.
When you remove the lid, the poolish will appear thick and sticky.
However, once fermented, the liquid will thicken considerably, making it easier to work with.
At this stage, you can divide the poolish into smaller batches and return them to a covered storage area.
To prepare each batch, simply add 1 cup of cold water and 2 teaspoons of active yeast per 1 1/4 cups of flour.
Stir until dissolved and wait for the mixture to bubble and expand.
Cover and refrigerate for 8 to 10 hours.
Do not discard the leftover liquid after this time, however, as it contains nutrients essential to the growth of yeasts.
Once ready to use, remove the poolish from the refrigerator and let sit for 15 minutes while coming to room temperature.
Divide the mixture into four equal parts and shape it into loaves about 1 inch thick.
Place each piece into a prepared pan lined with parchment paper.
Let the loaves rise for 60 minutes in a draft free environment.
Once risen, preheat the oven to 450 degrees Fahrenheit.
Bake the loaves for 20 minutes, reduce heat to 400 degrees and cook for another 30 minutes.
Allow them to rest for 5 minutes before serving.
For a traditional sourdough style loaf, follow the same steps above except omit the addition of yeast.
Instead, dissolve 1 teaspoon of honey in 1/3 cup of warm water and add to the poolish along with the remaining ingredients.
Proceed with the remainder of the instructions without changing anything else.
Another option is to skip the shaping part altogether and just use the poolish to replace some of the flour when preparing your favorite recipes.
For instance, you could swap 1 tablespoon of poolish for every 3 tablespoons of flour when making bread.
Or you could add 1/3 cup of poolish to every cup of flour when making cookies or cakes.
What Is The Difference Between A Poolish And A Starter?
A poolish is similar to a starter but not identical to it.
While a poolish does contain both flour and water, it also contains yeast (or any other fermentable sugar).
In fact, this ingredient is what makes the poolish different from a standard starter.
If you look at the ingredients listed on most poolish recipes, you’ll notice that they include some form of flour, water, and yeast.
The amount of each varies depending on how much of each type of ingredient you plan to add together for a batch of poolish.
Poolishes are usually combined with additional ingredients including salt and sometimes oil.
These ingredients help the poolish rise during fermentation, just like a normal starter would.
But while starters need to rest before being fed again, poolishes only need to sit for about two hours after mixing up the ingredients.

Why do we make poolishes?
While poolishes aren’t intended to replace all of the flour you typically use in baking, they’re still perfect for people who want to bake their own bread without having to wait until the next day.
Many people find themselves unable to get out of bed early enough to start cooking breakfast every morning.
So instead of waking up earlier so they could eat a decent meal, these individuals choose to buy pre-made food items.
This means that they may end up eating processed foods that weren’t even prepared by them.
However, if someone has the freedom to sleep in late, then they might consider bringing homemade meals to work or school.
To keep things simple, many poolish recipes call for just four basic ingredients: flour, water, salt, and yeast.
Then, they simply mix those together and leave it alone overnight.
By doing this, you can ensure that you get the right consistency and texture for your finished product.
The resulting poolish is ready to go once you wake up the next morning.
You can either feed it directly into your bread machine or use it to create homemade pizza crusts.
Either way, you’re going to enjoy the results!
What Is The Difference Between A Poolish And A Preferment?
If you haven’t heard about either of these terms before, they both refer to a mixture of ingredients that are added to the other ingredients in order to create a specific type of dough.
The term “preferment” refers to this mixture while “poolish” refers to its purpose of being mixed with other dry ingredients for further processing.
The basic idea behind poolishes is to add extra nutrients to the existing ingredients so that they can produce better results during the subsequent process of kneading.
This means that the bread will rise more quickly and evenly throughout the entire baking process.
This process differs slightly depending on whether you want to make sourdough bread or not.
If you do plan to make a sourdough loaf, then you need to start by creating a poolish.
Once you have done this, you should store the poolish in the fridge until needed.
Then, all you need to do is mix up the rest of the ingredients and let them sit for 15 minutes.
Once the dough has been formed, you must allow it to ferment at room temperature (70 degrees Fahrenheit) for around 1 hour.
After this stage, you can shape it into loaves.
On the other hand, if you aren’t planning to make sourdough bread, then you just need to follow the same procedure but instead of storing the poolish in the refrigerator, simply leave it out on the countertop where it can warm up naturally.
Regardless of what kind of poolish you decide to use, here’s how to make one.
- Add ½ cup of warm water to 3½ cups of unbleached white flour and stir thoroughly with a spoon.
- Cover the bowl with plastic wrap and let stand overnight.
- In the morning, remove the lid and discard any foam that may have risen to the top.
- Stir in another ¼ cup of water, 2 tablespoons of sugar, and ¾ teaspoon of salt.
- Repeat steps two through four once again, adding another ¼ cup of water each time until you reach 5 cups total.
- Cover the bowl with plastic wrap and refrigerate overnight.
- After 12 hours, transfer the contents of the bowl to a large mixing bowl.
- Combine the remaining 6¼ cups of flour with the 4 teaspoons of instant yeast, ¾ teaspoon of salt, and 1 tablespoon of olive oil.
- Mix well.
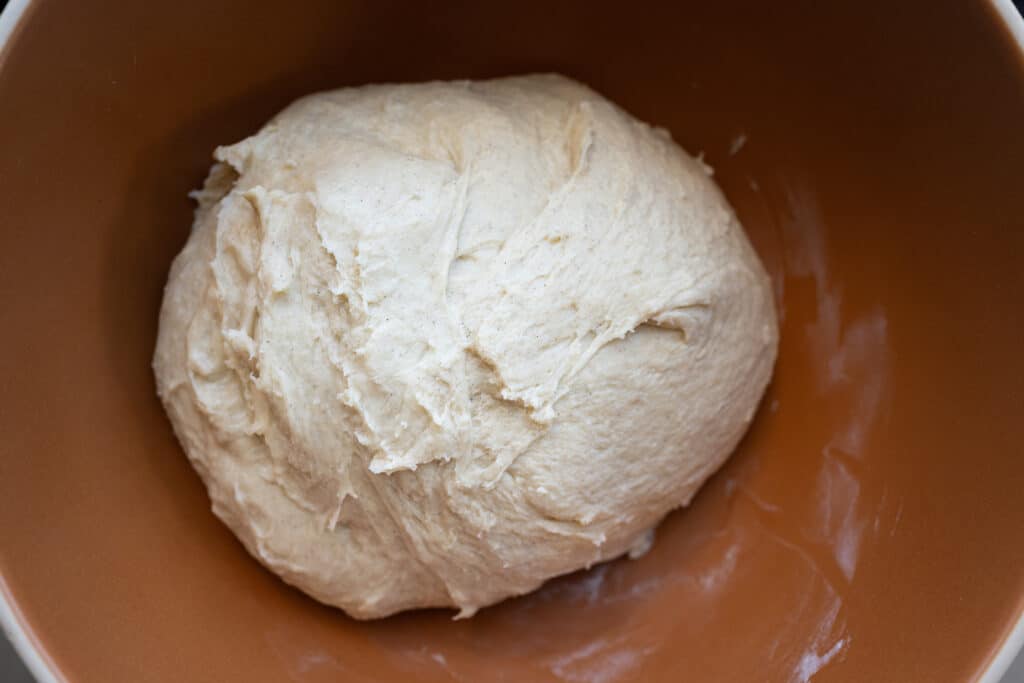
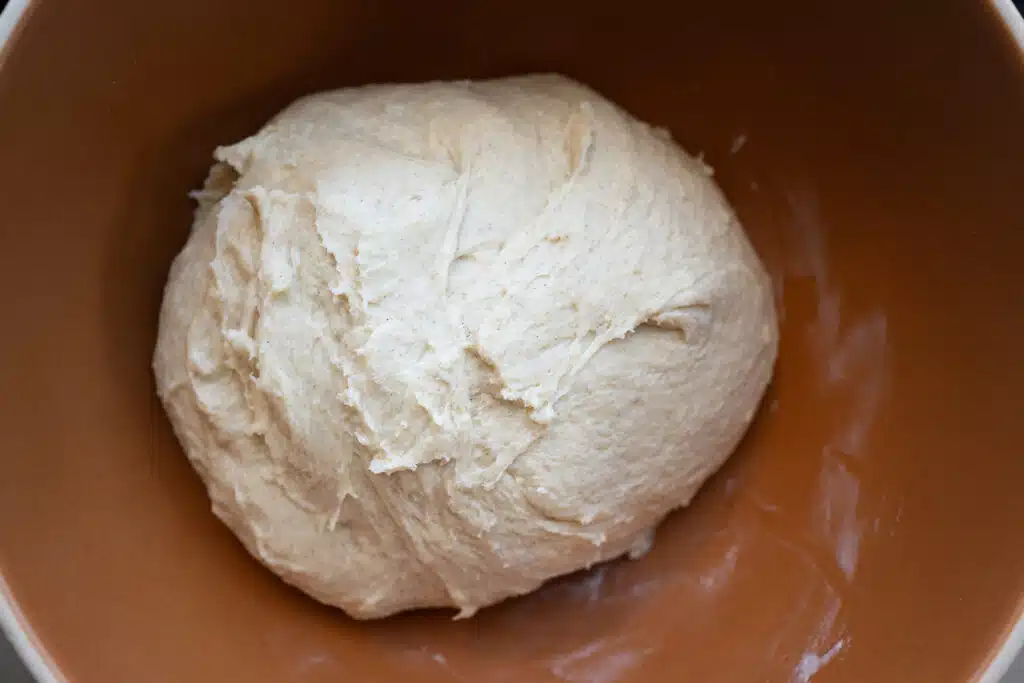
- Lightly kneed together the wet ingredients and the dry ingredients until you have a firm ball of dough.
- Divide the dough into small balls, roughly the size of golf balls, and place them back into the container.
- Store the containers in the refrigerator overnight.
- Remove the next day, take the dough out of the container, and gently roll into a flat sheet.
- Place the dough onto a floured surface and cover with a clean towel or plastic wrap.
- Let the dough rise for approximately 2 hours.
- Preheat the oven to 450 F degrees.
- Spray the inside of the pan with nonstick cooking spray.
- Roll out the dough with a rolling pin into a circle about 10 inches wide.
- Spread the dough with some butter or margarine.
- Bake for 15 minutes, flip over and continue baking for 15 minutes longer.
- Cool completely before slicing.
What Are The Benefits Of Using Poolish In Baking?
A poolish is essentially a pre-fermentation starter that contains both sugar and salt, along with some liquid (usually water).
Baking with poolish means that you’re able to skip the first step of fermentation, which involves mixing all of the ingredients together before letting them sit for anywhere from four hours to overnight.
This allows you to start right away on your baking project without having to wait around for anything to ferment.
If you want to make sure that your finished product has a consistent texture throughout, using a poolish ensures that everything will come out tasting uniform.
Poolishes are incredibly useful when you need to work quickly because they require very little effort to prepare.
All you really need to do is add the poolish to whatever you plan on making, mix well, let it rest, and voila! Your finished product will taste exactly how you intended it to.
For example, let’s say I wanted to make my favorite kind of pizza—cheese pizza—but was running late and didn’t have enough time to leave the house.
Instead of wasting precious minutes waiting around for the oven to heat up, I could just throw the balled dough onto the countertop and proceed to make the cheese sauce while it bakes.
After about 15 minutes, I would transfer the cooked crust back over top of the sauce, and viola! You just completed a quick and easy meal.
By skipping the initial fermentation process, you also save money since you won’t have to buy premade yeast or other expensive ingredients.
In addition, you get to enjoy a quicker turnaround time, so you can actually eat what you cook rather than saving it for later.
Are There Any Disadvantanges To Using Poolish?
As with all things culinary, there are pros and cons to using poolish.
Here are some of them:
- Poolish doesn’t create a flatter crust since its purpose is not to provide gluten for structure but rather to add flavor and texture.
- It requires more work because you need to make two separate batches (one for the poolish and another for the finished product)
- Its shelf life is relatively short (usually about 3 days).
- You won’t get the same rise and taste compared to traditional recipes
The good news is that you can easily remedy most of these issues by following a few simple steps.
For example, instead of buying premade poolish, you could simply prepare your own at home with ingredients found around your house.
This way, you’ll always have plenty on hand to satisfy your cravings!
How Long Does Poolish Last?
Poolish is actually not a specific ingredient but rather refers to a method for preparing a leavening agent (yeast) before incorporating it into a finished product.
The term “poolish” was first coined by French bakers who would mix up a small amount of their freshly ground wheat with cold water and a pinch of salt before letting the mixture sit overnight.
When they were ready to make their next batch of bread, they simply added this starter dough to their main ingredients instead of using all of the usual flour.
The resulting bread had more flavor because the fermentation process occurred over several days.
As a result of this prolonged period, the protein content of the new dough increased significantly, giving rise to its name—the word “poolish” derives from the Latin word “poolis,” meaning “a little bit,” or “something less than full strength.”
Although poolish has been around for centuries, modern techniques allow us to produce a better version today.
In fact, many bakeries now create their own poolishes at home or purchase them from specialty suppliers online.
So how long do poolishes last? Well, it depends on what kind of poolish you are creating.
Some recipes require a short-term storage option while others need to be refrigerated until needed.
For example, some people may want to keep their poolish for a day or two so they can add it to other items without having to wait too long between batches.
Others may choose to let the poolish ferment longer and store it indefinitely in the refrigerator.
In general, however, poolishes usually only last about three weeks once mixed together.
This means that you should plan ahead if you intend to use yours for a special occasion.
What Is Poolish Made Of?
A typical poolish contains equal parts whole grains and white flour along with just enough water to form a sticky paste.
If you decide to make your own poolish, you can use almost anything as long as you avoid acidic foods.
However, most poolishes contain unbleached all-purpose flour and water.
If you wish to experiment with different types of flours, feel free to try out alternative options like rye, spelt, or even brown rice flour.
You also might consider adding additional nutrients like honey, molasses, oil, seeds, nuts, herbs, spices, or fruits to help boost the nutritional value of your finished food products.
It’s important to note that poolishes are often referred to as “preferments” or “starter doughs” because they are intended to serve as the basis for future doughs.
While these terms may seem interchangeable, keep in mind that poolish differs slightly from other forms of preferments because it isn’t meant to be eaten by itself.
Can You Freeze Poolish?
Poolish has been around since ancient times when people were first learning how to make bread.
Poolish was originally created by placing a small amount of flour in warm water with yeast added.
The mixture would sit overnight until it had fermented slightly before being mixed into a larger batch of flour and water.
Today, poolish still forms the basis of many recipes.
When creating poolish, it’s important to keep in mind what types of ingredients work well together.
For example, using rye flour instead of wheat flour can help create a more flavorful loaf.
Other factors to consider include whether the finished product needs to rise quickly (for example, when making pizzas) or slowly (when making baguettes).
Because poolish contains both liquid and dry components, freezing it may not always be possible.
However, there are ways to freeze certain foods without affecting their texture, taste, or quality.
Freezing liquids
If you want to preserve the liquid component of a dish, try freezing it in ice cube trays so that you can easily add just enough liquid to any food to suit your taste buds.
Once frozen, transfer them directly to your favorite container or bowl.
You can even put them right back in the freezer once they thaw out again!
Frozen fruits and vegetables
Since most fruit and vegetable juices contain natural sugars, freezing them doesn’t usually affect their flavor.
But if you really need to save space on your refrigerator shelf, you can also freeze these items individually.
Just remember to remove them from the packaging before transferring them into storage containers.
Prepared sauces
Although store-bought tomato sauce might seem convenient at first glance, it often ends up costing you money over time because you end up buying more than you actually need.
Instead, prepare your own homemade sauce with tomatoes, herbs, spices, and other seasonings.
If you do decide to buy prepared sauce, check labels carefully to ensure that they aren’t full of preservatives and artificial colors.
And if you do choose to purchase canned or jarred products, drain off excess liquid to avoid having water spots appearing on your countertops.
What Are Some Common Uses For Poolish?
The most typical purpose for using poolish is to make sourdough starter.
The term sourdough refers to a type of leavening agent that has been soaked with wild yeasts found on air and other surfaces.
Sourdough starters also contain bacteria, so they need to be fed regularly with small amounts of flour, water, and a little bit of sugar (or honey) to keep them alive and active.
Poolish acts as a sort of starter and helps create the perfect environment for the sourdough to thrive.
Once you get started making your own poolish, you’ll probably find yourself wanting to eat all of your creations straight out of the oven!
You can even use poolish to make quick bread recipes by replacing up to half of the flour in the recipe with poolish instead.
For example, try this easy banana bread recipe where you replace half of the flour with poolish.
If you want to learn more about how to make poolish, here are a few resources we recommend checking out:
- How To Make Poolish Recipe – This video tutorial shows you how to make poolish quickly and easily at home.
- Bread Baking 101 – Learn everything you need to know about bread baking with this detailed guide.
- Sourdough Bread Recipes – Try these simple sourdough bread recipes and see what you think.
Make your own sourdough starter
To start off, you’ll need:
- 1 cup warm filtered water
- ¼ teaspoon instant dry yeast
- ½ cup organic white whole wheat flour
- ¾ cup organic unbleached white flour
Mix ingredients together well
Combine all of the above ingredients together in a large bowl until they form a paste.
If your paste feels too wet and sticky, add additional flour 1 tablespoon at a time until desired consistency is achieved.
Cover bowl tightly with plastic wrap and allow to sit overnight at room temperature until liquid becomes bubbly and rises slightly.
This process takes 12 hours but can take longer depending on the weather outside, humidity levels, etc.
When the mixture begins to bubble and rise, it’s ready to be used as part of your next batch of homemade loaves.
Ingredients
- 300 g flour
- 300 ml water
- 5 g fresh yeast
- 1 tsp honey
Instructions
- Whisk fiercely for 30 seconds after adding the water and yeast to a small bowl. On top, the mixture ought to bubble. Alternatively, if it doesn’t and the yeast granules float, the yeast is “dead” and needs to be thrown away. Start over with a new quantity of yeast and water.
- With a rubber spatula, add the flour and thoroughly incorporate. It will have a thick texture, similar to thick pancake batter.
- Clean the bowl’s sides, wrap it in plastic wrap, and let it at room temperature for 18 hours. 30 minutes should be spent chilling before use.
- If you are not using the starter right away, you can store it in the refrigerator, though I suggest keeping it for no more than 8 hours. Bring to cool room temperature before using.
Video
Nutrition
My blog is all about creating delicious meals with ingredients that are easy to find in your local grocery store. I’m passionate about making yummy meals that I can share with my friends and family.